Alice Cafe_before & atfer
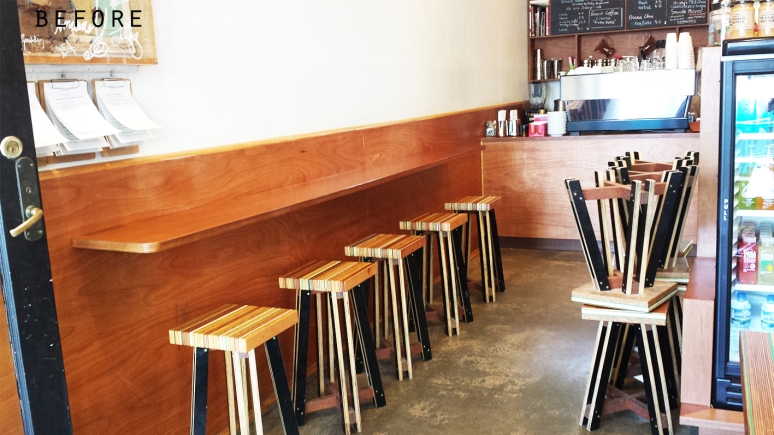
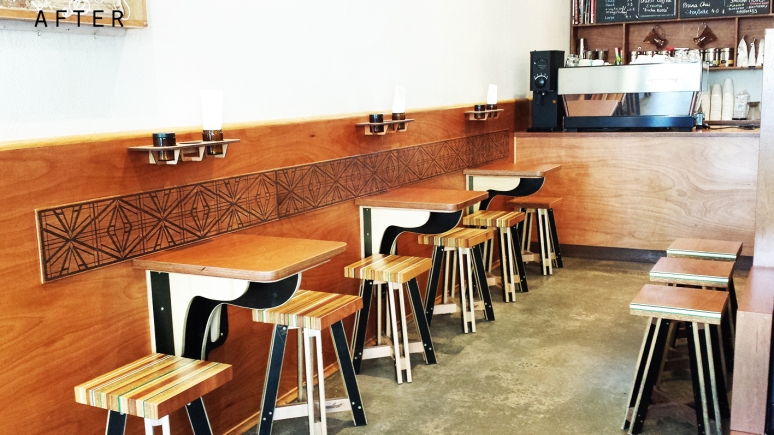 Alice there’s alot to say about this cosy little cafe. Tasty pastries and cakes baked in house with the best coffee in town supplied by Padre.
Owner Richard asked me to come on board a little over 2 and half years ago to put his plans into action. Even though we were starting with nothing more than a empty shell there was no room for error with what felt like a shoe box. The floor plan had to be tight and well thought out. After 4 weeks of building and some head scratching the tools were down. At that point I would say we were happy and surprised to see how functional it would be. The floor plan allowed us to squeeze a separate kitchen, espresso bench, POS station, hot & cold food display and two different seating areas with a communal table. Managing all this gives the feel of a big cafe with a small footprint.
A little over a year later we thought we could improve some of the design. After bouncing some ideas around and crunching the millimeters we were able to convert the existing wall seating into a 3 table design. Above are some before and after photos. This improved the functionality by making the space more inviting to sit down, have a bite to eat and take in the cafe experience.
Stool & Table Samples
 When times are quiet there’s always an idea that needs some attention. Here’s a few photos of some one offs I made. The stool top was 1 of 4, laser etched photos from a trip to Tokyo. The coffee table was designed around the tinted glass found on the side of road.
Record Cabinet
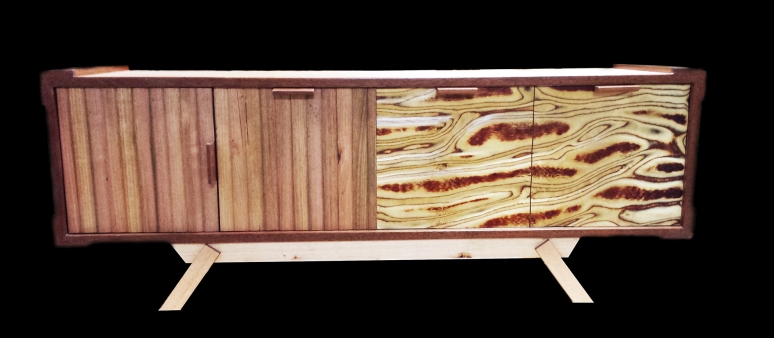 Here’s a finished photo of the cabinet. After fitting Hettich soft close drawer runners to the three record storage drawers it wasn’t far from finished. The left hand side door and matching drawer were made from salvaged Tasmanian oak mouldings with merbau handles. Hopefully one day I’ll make another and change the design, carrying the sculpted ply right through the front for a seamless look.
Shaped, Sanded & Oiled
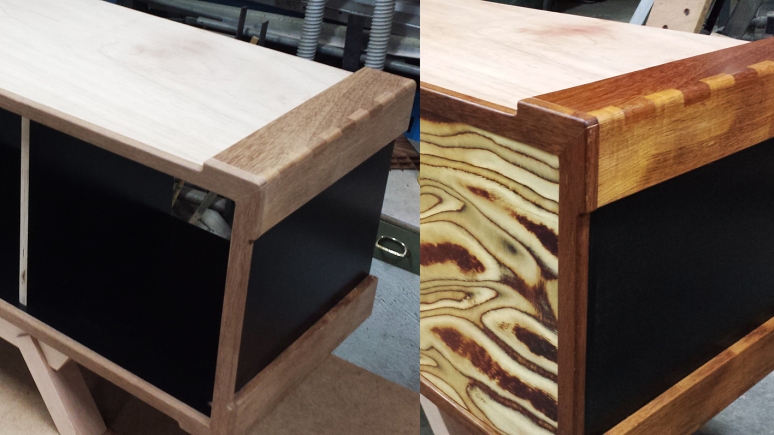 Its times like this when you want to race through the next steps and finish so you can load it in the van and take it home. After shaping the front edging to a smooth join with the corner capping it was time to rub some oil in for the first time.I couldn’t stop there, I had to cut the sculpted ply panel for the drawer fronts just to see how they all looked together.
Cabinet Assembly
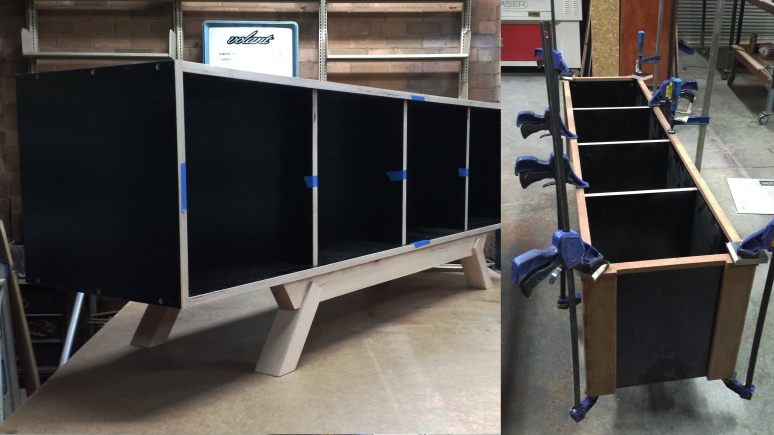 Heres some photos of the cabinet taking shape. I’ve used 18mm form ply for the carcass which I had left over from another project. I find this the best material by far for internal cabinet surfaces because of its smooth non porous finish, easy to wipe clean and strong construction character. I wanted to steer away from any visible plywood edges so I’ve capped the front edge with merbau to match the finger join corners I made earlier.
Finger join
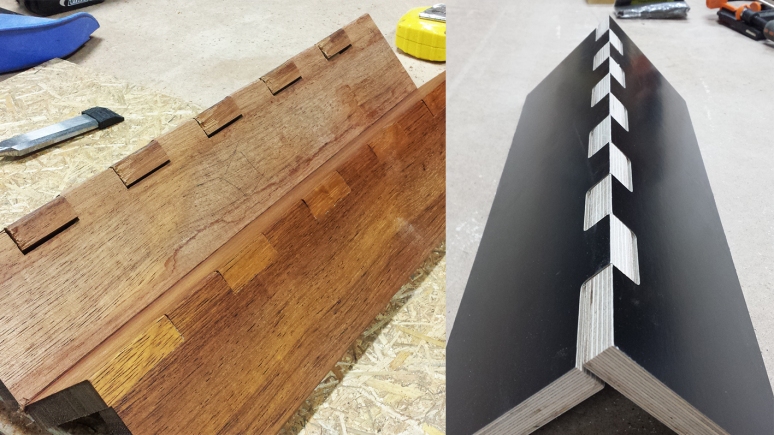 I’ve always liked dove tail joins and at one time had a collection of old vintage drawers that had them which I saved for some wall hanging boxes with laser cut screens attached to the front. For the record cabinet I was building I wanted to replicate the dove tail look to cap the corners of the carcass without the difficulty of cutting them by hand. Making laser cut templates for each side and cutting them with the router worked well. I made a sample using form ply before cutting the merbau.
Record Cabinet legs
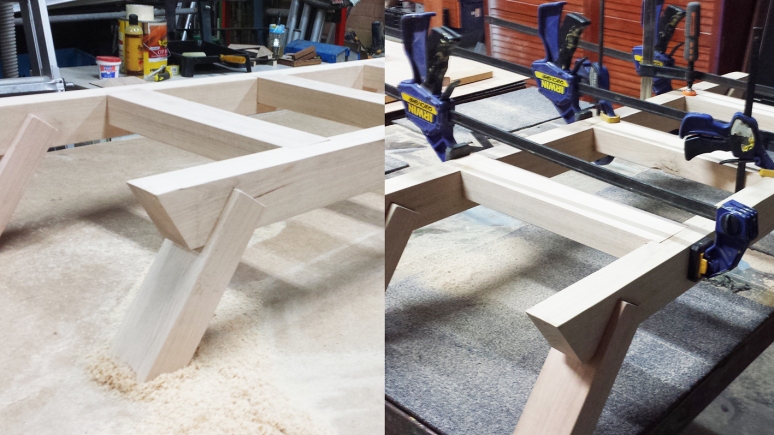 With so many unused and homeless pallets loitering around, spending hundreds of dollars for wood does seem pointless when making your own furniture.
Router Jig
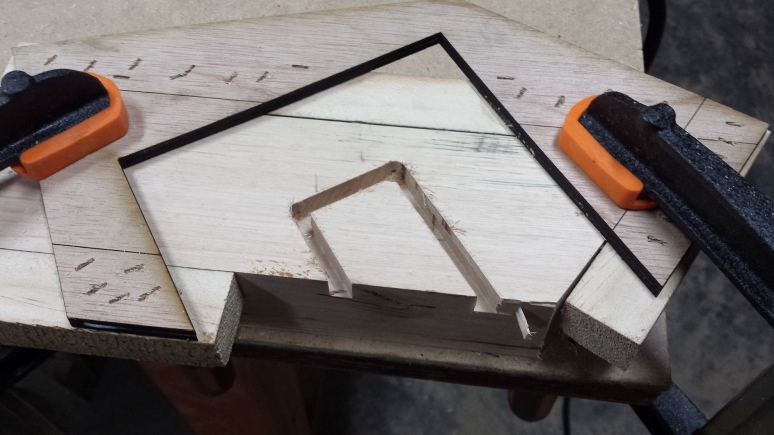 I was taken on a different path when I decided that I was using far too much sheet material in my work ie plywood & acrylic. I also knew that I could be more resourceful in finding material to work with which would inspire new ideas. Pallet wood is one material I like using but I needed to design quick and efficient ways to cut leg notches. I found that laser cutting a template from 3mm ply that my small hand router could follow works well for a range of different joints. Here is a photo of a jig clamped to some recycled mountain ash for a leg joint for a record cabinet.
Sculpted Plywood
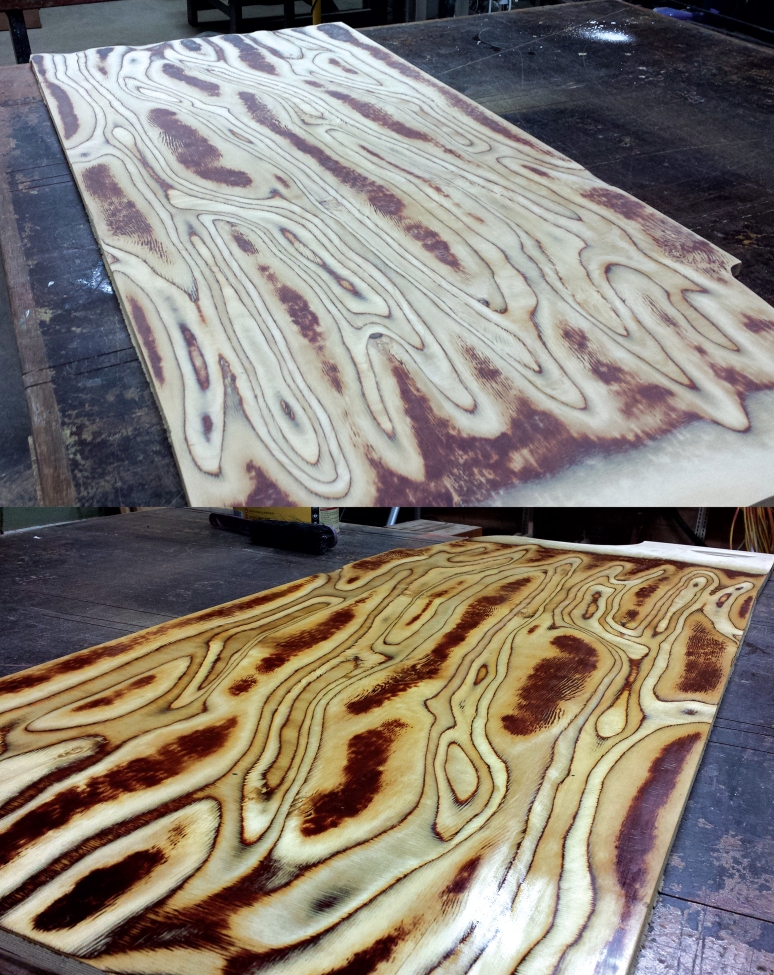 I’m calling this sculpted plywood. I stumbled across it while making some lamps from 8mm plywood. Its a technique I played around with 4-5 years ago and since then I’ve applied it to different species of ply for different tones and effects.This panel is 15mm hoop pine carved with a 120 grit flap disk attached to a hand held grinder, sealed with oil. This panel will later be used for some drawer fronts for a record cabinet.
New Workshop Fit out
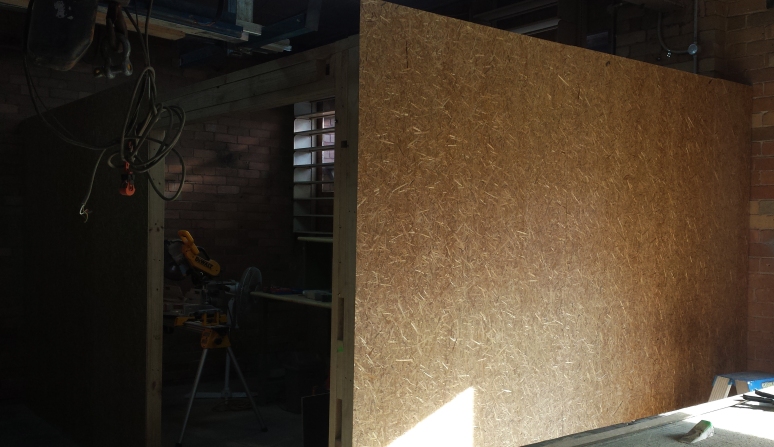 2014 proved to be a busy year. Although looking at my blog says otherwise as I haven’t posted a single entry in over a year (may 2013) to be exact. This doesn’t mean I haven’t been making anything or keeping a finger on the pulse. I’ve worked on many projects, mostly commercial, a few private and some other stuff just for kicks. Hopefully over the next year I can post more photos of current projects. I’ll start it off with a photo of the workshop fit out in progress. After relocating my workshop space twice in early 2014 I found a space tucked away from the madness in the middle of madness we call Melbourne.
-
Recent Posts
Archives
Categories
Meta
